How to manually install ComfyUI
Posted: 2024-5-20ComfyUI is an advanced graphical user interface for Stable Diffusion. Featuring a modular node interface that provides enhanced control over the image generation process. This allows users to fine-tune and customize their generated images with greater precision and flexibility.
One advantage of running your own local LLM there’s no censorship. You have full control over the model and its outputs, allowing you to customize and modify it according to your specific needs and preferences. Let’s get started!
Prerequisites
Before you begin, ensure you have:
- Python 3.8 or later installed
- pip (Python package installer) installed
- Git installed
Step 1: Clone the ComfyUI Repository
Open your terminal or command prompt and run the following command:
git clone https://github.com/comfyanonymous/ComfyUI.git
cd ComfyUI
Step 2: Installing PyTorch with Nvidia CUDA
Install stable PyTorch with CUDA using this command:
pip install torch torchvision torchaudio --extra-index-url https://download.pytorch.org/whl/cu121
Step 3: Install Dependencies
Install the required dependencies with the pip install command:
pip install -r requirements.txt
Step 4: Download the Pre-trained Models
To use ComfyUI, you need to download pre-trained models. Head over to Civitai and select a checkpoint that interests you. There’s a wide variety of checkpoints available, each trained on different datasets. There’s no single best checkpoint, so feel free to experiment and find the one that suits your needs.
Stable Diffusion Checkpoints
- SD1.5 (Stable Diffusion 1.5)
- Earliest version of Stable Diffusion.
- Images are cropped and trained on 512x512 pixels.
- Well-tested and reliable for various applications.
- SDXL (Stable Diffusion XL)
- Second more advanced version of Stable Diffusion.
- Trained on larger images, usually 1024x1024 pixels.
- Better choice for landscape photorealistic realism images.
- Pony Checkpoints
- Specialized for generating anime artwork.
- Generally trained on standard sizes such as 512x512 pixels.
- Trained on a dataset rich in pony art.
Recommend Checkpoints
- SD1.5
- SDXL
- Pony
Organizing Checkpoints
Place your Stable Diffusion checkpoints (the large .ckpt or .safetensors files) in the ComfyUI/models/checkpoints directory. Create the directory if it doesn’t exist:
mkdir -p models/checkpoints
To keep your checkpoints organized, create subfolders inside the checkpoints directory. For example, you might want to separate the models for different versions, such as:
ComfyUI/
└── models/
    └── checkpoints/
        ├── SD15/
        ├── SDXL/
        └── Pony/
Step 5: Run ComfyUI
With everything set up, you can now run ComfyUI. Execute the following command:
python main.py --force-fp16 --use-pytorch-cross-attention --disable-smart-memory
Extras
When ComfyUI generates an image, it embeds metadata within the .png file. This metadata includes the seed and keywords used during generation. You can drag and drop the .png file back into ComfyUI to automatically load the workflow with the original seed and keywords, allowing you to recreate or adjust the image generation process.
Hires Fix
Hires fix should be the first example you should get to know. The “Hires fix” technique involves generating an image at a lower resolution, then upscaling it and processing it again using the img2img function. This technique will add even more detail to the generated image.
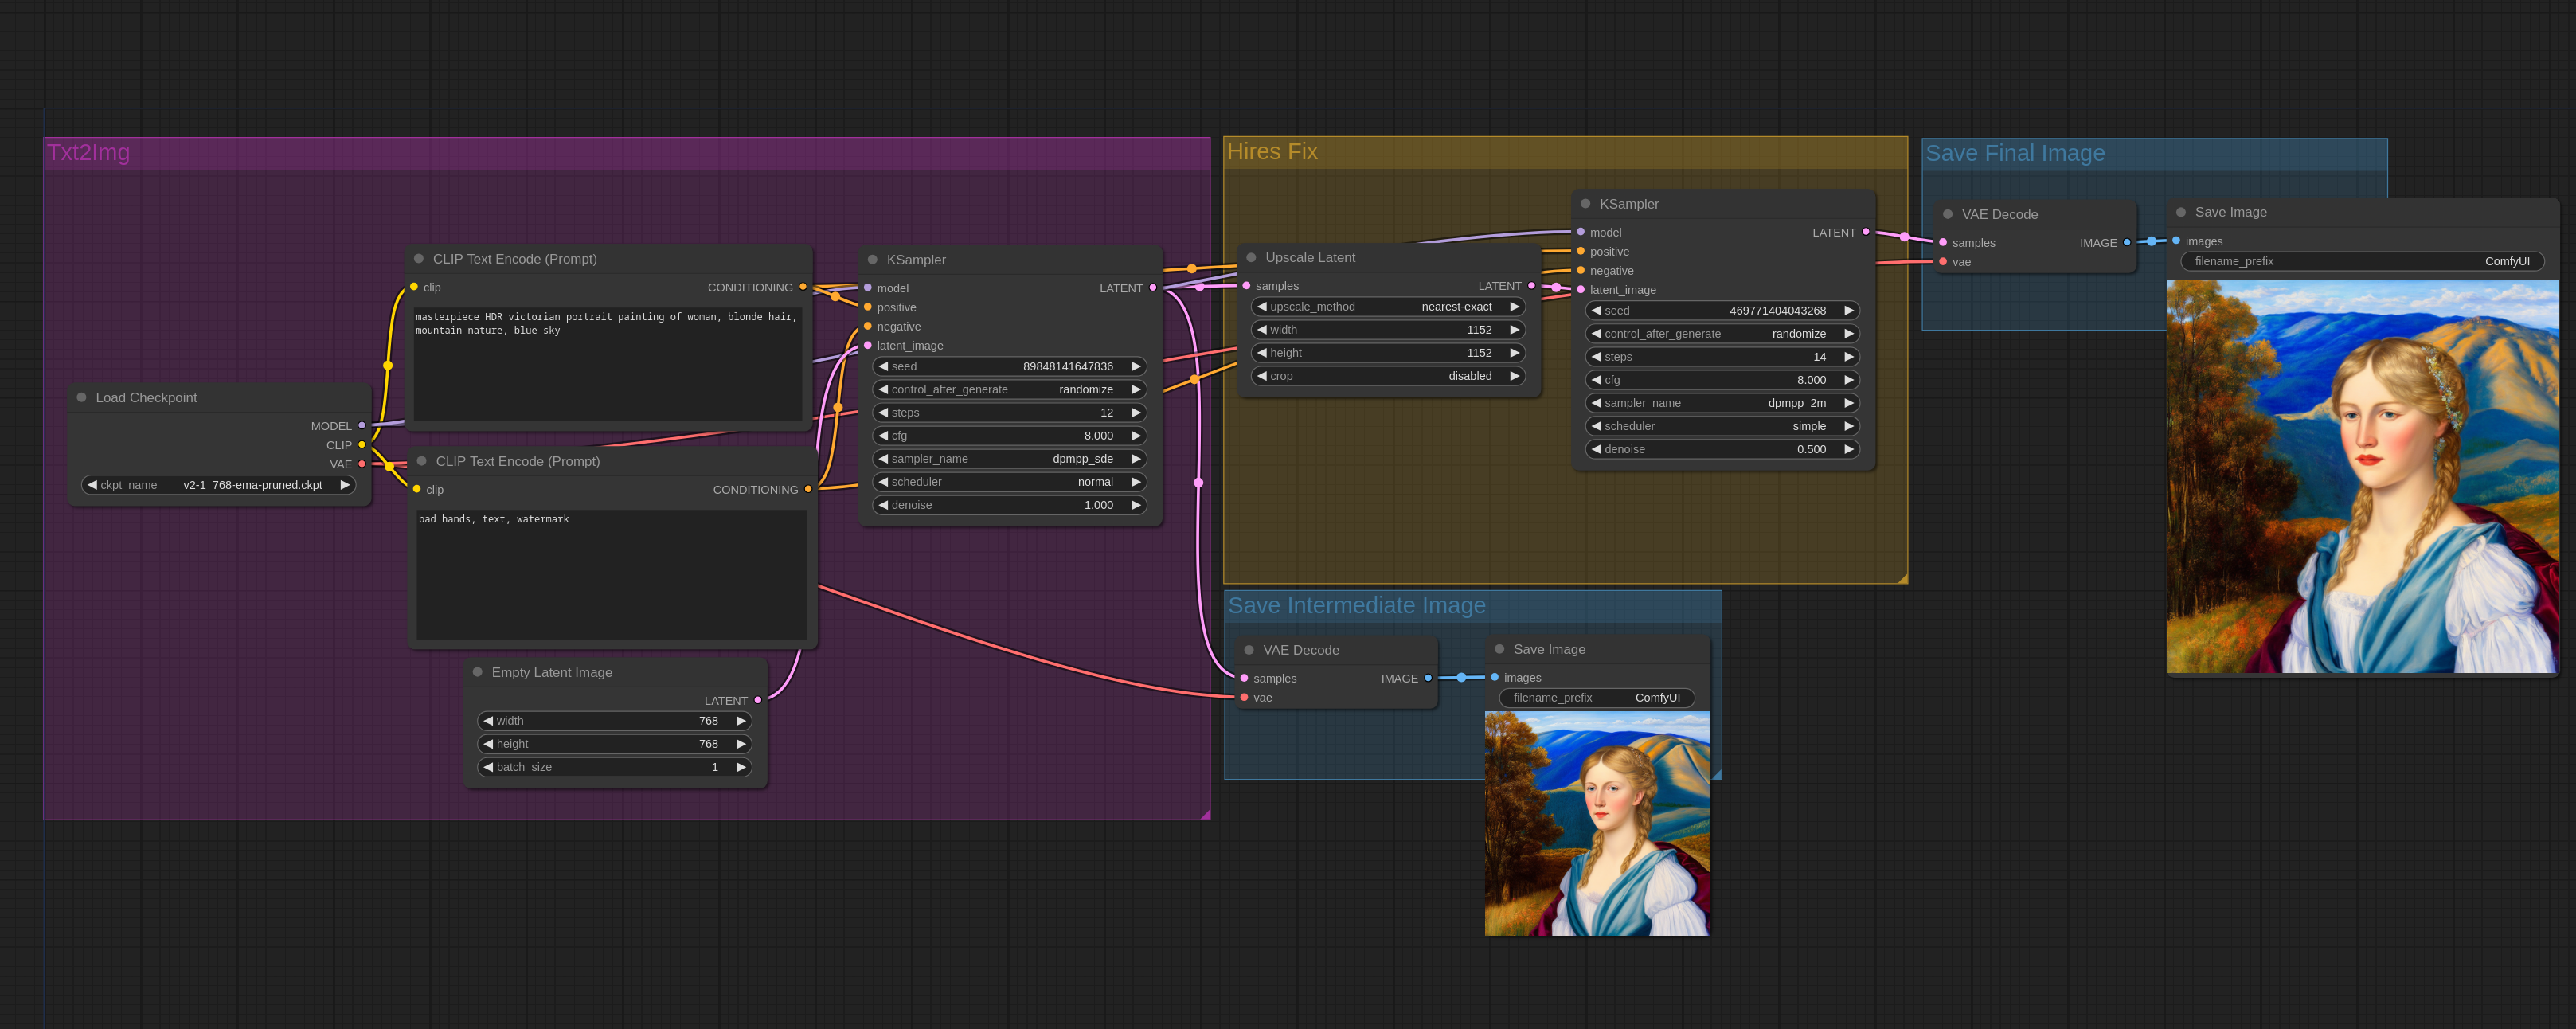
The Hires fix workflow includes Upscale Latent node and two KSamplers. After the first pass through the KSampler, an intermediate image is saved while the latent data is passed to the upscaler and the second KSampler. Finally, the upscaled high-resolution image is decoded and saved.